Showing posts with label Dessert. Show all posts

Friday, March 23, 2012

Pound Cake


Dessert should be enjoyed with a glass of milk. If you're out of milk, you should use whipped cream. Lots of it. So make sure you either have milk or whipped cream on hand before you whip this up. And strawberries. Because strawberries, whipped cream, pound cake, and milk makes for a delicious afternoon treat.

This pound cake recipe is delicious. The only thing it was missing, which could have been an error on my part since it was my first time making a pound cake, was the slightly crunchy outside. But other than that, it was delicious.

Pound Cake

3 sticks butter
3 cups sugar
5 whole eggs
1 tsp butter flavoring
2 tsp lemon flavoring
3 cups All-Purpose Flour
1 cup Sprite, 7-Up, or Sierra Mist

Preheat oven to 325º. Cream butter. Add sugar to butter, 1 cup at a time, mixing after each addition. Add eggs, 1 at a time, mixing after each one. Add butter and lemon extracts and mix well. Add flour, 1 cup at a time, mixing well after each addition. Add soft drink, and mix until combined, scraping sides of bowl to make sure everything mixes.

Pour batter into a greased Bundt pan and bake for 1 hour to 1 hour 10 minutes, until cake no longer jiggles. Remove from oven and invert until cake drops out. Enjoy!

Friday, March 16, 2012

Blue Moon Cupcakes


Well, this post is about a month late. For the Super Bowl, we decided to make Blue Moon Cupcakes for dessert. Football, beer, and Marines just kind of go together. Part of me was kind of hesitant because I love cupcakes and I worried adding beer would ruin the cupcake. But these guys were delicious!

My friend, Whitney, whipped up the cupcakes while I was making everything else. She did such a great job and even added her own little twist to the recipe by adding some Blue Moon to the frosting! The cupcakes by themselves had only a tiny hint of Blue Moon but adding the Blue Moon to the frosting really gave these some more flavor.

And I just had to include a picture of our Super Bowl sunset!

Blue Moon Cupcakes
Source: Erica's Sweet Tooth

For the cupcakes:
3/4 cup butter, room temperature
1 3/4 cup sugar
2.5 cups flour
2 tsp baking powder
1/2 tsp salt
3 eggs, room temperature
1 tsp vanilla
1/2 tsp orange zest
1 cup Blue Moon, plus more to brush on tops
1/4 cup milk
orange wedges for garnish

Preheat oven to 375º and line 24 muffin tins with cupcake liners.

In a medium sized bowl, whisk together flour, baking powder, and salt. In the bowl of an electric mixer, beat together the butter and sugar until light and fluffy, about 2-3 minutes. Add eggs, beating after each addition. Add the vanilla and zest.

Combine milk and beer and alternatively add this mixture and the flour mixture to the butter and sugar, mixing on low speed.

Fill the cupcake liners 2/3 full and bake for 18 minutes. When cupcakes are done, poke holes in the tops and brush with beer.

For the cream cheese frosting:
12 oz cream cheese, cold
6 tbsp butter, room temperature
1 tbsp freshly squeezed orange juice
1 tsp orange zest
4 cups powdered sugar

Cream together the cream cheese and butter in an electric mixture until smooth and creamy, about 2-3 minutes. Add the citrus juice and zest; gradually add the powdered sugar until well-combined. Beat until smooth for about 2 minutes.

Once cupcakes are cooled, load frosting into a piping bag and pipe onto cupcake tops.

Monday, November 21, 2011

Crock Pot Baked Apples


I love Pinterest. It's an addicting kind of love but I like it. One of my favorite things to pin is food. I love looking at all the pictures and getting inspiration. When I saw these, I was reminded of the cinnamon baked apples they used to serve in elementary school lunches.

These were the perfect fall dessert to follow our pumpkin meal. They were easy to prepare and they made the apartment smell delicious while they were baking.


Crock Pot Baked Apple
Source: Skinny Chef

1/4 cup brown sugar
1/4 cup walnuts, chopped
2 tbsp trans-fat free magarine
1 tsp cinnamon
6 Gala or Macintosh apples, cored
1/2 cup apple juice or apple cider
2 tbsp prange liquor, optional

Preheat a large crock-pot on high heat and preset it for 3 hours. In a large bowl, mix brown sugar, walnuts, margarine, and cinnamon. Fill the apples with the filling and place them in the crock-pot. Pour in the apple juice or cider and the liquor, if using. Cover and cook 2.5-3 hours on high heat until the apples are soft and begin to collapse. Enjoy!

Friday, November 11, 2011

Pumpkin Week: Pumpkin Snickerdoodles


Hope y'all are enjoying all the pumpkin recipes! Today's recipe stood out to me because it involves a cookie you normally only see at Christmas: Snickerdoodles.


But these are even better than regular snickerdoodles because they have pumpkin in them! I love baking with pumpkin because it gives the cookies a different texture. These were delicious. The pumpkin flavor wasn't super pronounced but you could definitely taste it.

Pumpkin Snickerdoodles

For the cookies:
1 cup (2 sticks) salted butter, at room temperature
1.5 cups granulated white sugar
3/4 cup unsweetened pumpkin puree
1 large egg
2 tsp vanilla extrace
3 3/4 cup all-purpose flour
1 1/2 tsp baking powder
1/2 tsp salt
1/2 tsp ground cinnamon

For the rolling sugar:
1/2 cup granulated white sugar
1 tsp ground cinnamon
1/2 tsp ground ginger
1/2 tsp ground allspice

In a large mixing bowl, use an electric mixer to cream the butter until fluffy. Add sugar and pumpkin puree and beat well. Mix in egg and vanilla, scraping down the sides of the bowl to incorporate all the ingredients.

In a medium bowl, whisk together flour, baking powder, salt, and ground cinnamon. Beat the flour mixture into the liquid mixture a little at a time until just incorporated.

Cover dough with plastic and chill at least an hour, or until dough becomes slightly firm.

When ready to bake, preheat oven to 350º. Line baking sheets with parchment paper, or spray with nonstick spray. Mix rolling sugar ingredients in a small bowl.

Remove cookie dough from refrigerator. Use a medium cookie scoop or a large spoon to scoop out dough and roll into balls. Use your hands to roll the balls in cinnamon sugar nd make sure they are coated really well. Place 2 inches apart on prepared cookie sheets. Use a flat-bottomed glass dipped in sugar and flatten the balls.

Bake at 350º for 10-14 minutes, until they are slightly firm to the touch. Let cool on baking sheets for 5 minutes and then remove them to a wire rack and cool completely. Enjoy!

*Store in an airtight container. These cookies freeze well. Just place them in a freezer zip bag and remove from freezer when the craving hits.

Thursday, November 10, 2011

Pumpkin Week: Pumpkin Roll


Sometimes, I don't follow recipes to the exact letter. I make substitutions if I'm missing an ingredient or I add a little sumthin sumthin if I think it will make the recipe even better. And sometimes, like in the case of the Fiery Arrabiata Sauce, I misread tsp as tbsp and almost burn my husband's tongue off. Hey, everyone makes mistakes.

Then, there are nights like last night. I was preparing today's recipe and realized I had neither butter nor wax paper. But, I had pumpkin butter so I subbed that instead. Good idea. It changed the color of the filling but it was still delicious. As for the lack of wax paper, I was too lazy to run to the grocery store for one thing and I decided to make it without wax paper, because, hey, I'm risky like that. Big mistake. My pumpkin roll ended up looking like this:


Just so everyone is clear on what a roll actually looks like, it should have looked like this:

Photo from Fashionably Foodie-check her out, she has some yummy recipes and photos and she can obviously follow directions and make a beautiful pumpkin roll.

I encountered just one problem when removing it from the pan: it cracked in half. I tried pushing the warm insides together with my fingers to seal the crack but it didn't work. I still attempted to roll it but I caused another crack. So I gave up and slathered on the filling and cut myself a slice to reward me for a job done badly.

It was good. It didn't even matter that it wasn't rolled right and the colors weren't perfect. Sometimes different is just fine.

Pumpkin Roll
Source: How Does She

Roll
1 cup sugar
1 tsp baking soda
3/4 cup flour
2/3 cup canned pumpkin
3 eggs
1/2 tsp cinnamon
1/3 cup walnuts, optional

Filling
8 oz cream cheese
1 tsp vanilla
1 cup powdered sugar
2 tbsp soft butter (or pumpkin butter)


Preheat oven to 375º. Line a cookie sheet with wax paper and grease well.

Mix first 6 ingredients. Pour onto greased pan and sprinkle with nuts, if desired. Bake in preheated oven for 15 minutes.

While the bread is baking, you can prepare the filling. Mix all of the filling ingredients together until mixture is smooth.

How Does She has a great photo tutorial of the next step. Basically, you lift the roll from the pan on the wax paper and flip it upside down on a tea towel. Then you roll the tea towel up to form a log. Let the roll cool inside the towel for about 10 minutes. Then, unroll the towel and spread the filling evenly across the roll. If you want to be different, stop right here and enjoy the pumpkiny goodness. If you want yours to be pretty and fit to serve to company, roll it back up. Enjoy!


Friday, October 7, 2011

Recipe Swap: Mrs. Field's Apple Oatmeal Cookies


Have you ever had a recipe that just goes completely wrong? This recipe for the recipe swap was that one for me. But don't stop reading and write this one off; it's definitely worth making. The theme this time was pumpkin or apple recipes. I submitted my Pumpkin Butterscotch and Chocolate Chip Cookies.

It started out when my to-do list this week exploded. I knew I had to make the cookies but then I kept adding x,y,z to my list to get ready for school and my parents visit. Every time I got ready to make the cookies, something else would pop into my head. Finally, 10:00pm rolls around and I start to make them. But then I realize that the things I thought I had weren't in the pantry. I was missing cloves, lemon zest, and honey. With some quick thinking substitutions (maple syrup kind of has the same consistency as honey and it seemed like it could fit with a Fall-ish recipe), I was able to make these cookies.

These definitely tasted like Fall. Cinnamon and apples have to be one of the best combinations out there and adding oatmeal into the mix and putting it in cookie form just made the pair even better. Their texture isn't like your regular cookie; it's more cake-like but it's also extremely moist. I recommend going by the actual recipe but if you are in a pinch, don't hesitate to substitute.

Mrs. Field's Apple Oatmeal Cookies
Source: Delish

2.5 cups AP flour
1 cup quick oats
1/2 tsp salt
1 tsp baking soda
1 tsp cinnamon
1/4 tsp cloves
2 tsp grated lemon zest
1 cup dark brown sugar, packed
3/4 cup butter
1 large egg
1/2 cup unsweetened applesauce
1/2 cup honey
1 cup fresh apple, peeled and finely chopped
Extra quick oats for topping, optional

Preheat oven to 300º. In a medium bowl, combine flour, oats, salt, soda, cinnamon, cloves and lemon zest. Mix well and set aside.

Cream the sugar and butter together using an electric mixer. Add the egg, applesauce, and honey and beat at medium speed until smooth. Add the flour mixture in slowly until just combined. Using a spatula, fold in the apples.

Drop by rounded tablespoons onto ungreased baking sheets, 1.5 inches apart. You can sprinkle the unbaked cookies with extra oats if you'd like.

Bake the cookies for 23-25 minutes or until bottoms are golden. Enjoy!

Tuesday, May 31, 2011

Graduation Cupcakes

I've been absent this past week because I was home in Georgia for my little sister's graduation! Her graduating class had more than 750 students but it passed by surprisingly fast! I'm so glad I was able to be there and so proud of her for all she's accomplished!

For her graduation party, I volunteered to make Oreo truffles and cupcakes. I had seen the cap idea various places online and decided to add a diploma into the mix. These were a big hit with everyone and added to the graduation decor! Use your favorite cupcake recipe!

For the graduation hat, you'll need Reese's Peanut Butter Mini Cups, small rectangle shaped cookies (I used chocolate covered graham crackers), Twizzlers or Fruit Roll Ups, and small round shaped candy (I used Red Hots).

Place the peanut butter cup upside down on top of the frosting. Use frosting to adhere the cookie to the top of the peanut butter cup. Cut small strips of the Twizzers or Fruit Roll Ups and use the frosting to "glue" it to the cookie as the tassels. Add the Red Hots or mini M&M's on top of the tassels, and you have a graduation cap!

For the diplomas, I simply used Pirouette Cookies and cut them into thirds. I had planned to add a red twizzler tie around the "diploma" but left them plain instead. Enjoy!

Friday, April 1, 2011

Cookie Dough Truffles

Have you ever had one of those terrible, horrible, no good, very bad days where all you want is to come home and dig into some chocolate cookie dough? And after licking the tenth spoonful has been licked clean you realize you probably shouldn't have eaten so much raw egg let alone so much cookie dough? Yep I had one of those days except luckily I was able to skip the raw cookie dough and instead chow down on a few of these truffles.

These are delicious and taste just like cookie dough. They were much harder to roll into balls than the oreo truffles I made a few weeks ago. The dough was very sticky so I recommend putting it in the freezer for a little bit before you roll them. I also floured my hands for some but and while the dough didn't stick to my hands it did give the truffles a more floury taste. The other method I got from someone on the What's Cooking board was to make my hands slightly damp with water before rolling. This worked for a few but then I would have to wash my hands and start over. If anyone has any tips or suggestions for rolling these delicious little bites I'd love to hear them! I've seen this recipe many places on the Internet but I used this recipe from the Novice Chef.

1/2 cup butter, softened
3/4 cup packed brown sugar
2 1/4 cups all-purpose flour
1 can (14 oz) sweetened condensed milk
1 tsp vanilla extract
1/2 cup miniature semisweet chocolate chips (I had to use more)
1 1/2 lbs dark chocolate candy coating, chopped

In a mixing bowl, cream the butter and brown sugar until light and fluffy. Add the flour, sweetened condensed milk and vanilla; mix well. Stir in the chocolate chips. Shape into 1-inch balls and place on a wax-covered cookie sheet. Loosely cover and freeze for 1-2 hours or until firm.

In a microwave safe bowl, melt the candy coating, stirring often until smooth. Dip balls in coating and place back onto baking sheets. Refrigerate until firm, about 15 minutes. Store in refrigerator. Enjoy!

Monday, March 14, 2011

Apple Hand Pies

Happy Pi Day! Yeah, I know, I'm such a nerd :) But I love pie so this was the perfect excuse to try this recipe out! I love it because it's like built in portion control-as long as you only grab one! These are very easy to make and would be great so satisfy a sweet craving! Recipe source.

1 pre-made pie crust
1 granny smith apple, or your choice
1.5 tsp lemon juice
1/4 cup sugar
3/4 tsp cinnamon
tiny pinch of nutmeg
1 egg + 2 tbsp water, for egg wash

Preheat oven to 375º. Peel the apple and cut into very small cubes. Place the cut up apples in a bowl and add the lemon juice, sugar, cinnamon, and nutmeg. Stir until apples are well coated and set aside.

Roll out pie crust on your flour-dusted surface. Cut out circular shapes using a 4.5 inch diameter cookie cutter or the top of a wide glass. My crust yielded 5 + 1 small circular dough crusts.

Put 1-2 tbsp of the apple filling on each circular dough and fold in half. Use a fork to press the seams of the pie dough together. In a bowl, whisk the egg and water. Lightly brush each of the apple pies with the egg wash. Poke two small vent holes on the top of each pie.

Place pies onto a parchment paper lined cookie pan and bake for 20-25 minutes or until the surface looks golden brown. Remove from oven and let cool 5 minutes. Enjoy!

Wednesday, March 9, 2011

Chocolate Chip Cookie Dough Cheesecake Bars

These are the ultimate indulgence. What could be better than cheesecake with a chocolate chip and graham cracker base topped chocolate chip cookie dough? Maybe cheesecake with a brownie base topped with cookie dough? Hmm I'll have to think on that one.

Everyone enjoyed this combination and it's a great alternative when you need to bring a dessert dish... or just need something delicious to snack on. Recipe from Beantown Baker.

Crust
1.5 cups graham cracker crumbs
5 tbsp butter, melted
2/3 cup mini chocolate chips

Cheesecake
10 oz cream cheese, room temp.
1/4 cup sugar
1 egg
1 tsp vanilla extract

Cookie Dough
5 tbsp butter, room temp
1/3 cup brown sugar
3 tbsp sugar
1/4 tsp coarse salt
1 tsp vanilla extract
3/4 cup flour
1 cup chocolate chips (I added a 1/2 cup more)

For the crust: Preheat oven to 325º. Grease an 8x8 pan with butter, line pan with parchment paper and butter the paper. Combine crumbs and butter and stir until crumbs are moistened. Stir in chocolate chips. Press crust mixture into bottom of the pan. Bake for 6 minutes. Set pan on wire rack to cool.

For cheesecake: Using mixer, beat cream cheese and sugar until smooth. Add egg and vanilla extract, beating until just blended. Pour batter into cooled, baked crust.

For cookie dough: Using mixer and paddle attachment, mix butter, brown sugar, sugar, salt, and vanilla extract at medium speed until smooth. Adjust mixer speed to low and add flour. Mix until incorporated. Stir in chocolate chips. Drop cookie dough by teaspoons over the top of the filling.

Bake about 30 minutes or until set. Transfer to wire rack to cool. Place in refrigerator to chill. Enjoy!

Wednesday, February 23, 2011

Oreo Truffles

I saw these on Bakerella and knew I had to make them! Oreos were my favorite childhood cookie and any combination of chocolate with something is usually amazing. I took a quick break from studying to make a batch of these and they were gone by the next day- hubby took half of them to work but that still means the 2 of us consumed an embarrassing amount...

I had originally planned to make these for the Super bowl in the shape of footballs like Bakerella did here. However, mine looked more like the "footblobs" she posted so I gave up and just rolled them into little balls.

1 package oreo cookies (divided, use cookie and cream center)
8 oz cream cheese, softened
white chocolate bark (I used dark chocolate)

Finely crush 7 cookies in a food processor or place them in a ziploc bag and crush into a fine consistency. Reserve for later. Crush the remaining cookies and stir in softened cream cheese. Use the back of a large spoon to help combine the two together. Roll the mixture into 1" balls and place on a wax paper covered cookie sheet. Refrigerate 20 minutes.

Melt chocolate as directed on the package and then dip balls into chocolate, tap off extra and set aside on wax paper covered cookie sheet to dry. You can sprinkle the tops with the 7 crushed cookies for decoration. Once dry, refrigerate. Enjoy!


Tuesday, February 1, 2011

Peanut Butter Oatmeal Sandwich Cookies

These are the best cookies. Ever. My picture does not do them justice. Grease up your cookie sheets because you need to make these. Now.

I was a Girl Scout up until High School. My favorite time of year was cookie time! I loved selling cookies and trying to see which of the prizes I could get. My parents' attic is probably full of trash bags containing the large stuffed turtles or huskys that I won. I loved doing cookie sales outside of Bed Bath and Beyond but the reason I loved it so much was Do-Si-Dos! Thin Mints came in a close second place but the peanut butter and oatmeal combination of Do-Si-Dos was, and is, the best.

I've made these three times in the past two weeks. I, of course, sent half of them to work with the hubs but I have consumed way too many of these. The cookie itself is delicious but adding the creamy filling is... mmmm, I can't even think of a word for it. Recipe from Annie's Eats, originally from Allrecipes.

Yields about 18 sandwich cookies

For the cookies:
3/4 cup all-purpose flour
1/2 tsp baking soda
1/4 tsp baking powder
1/2 tsp salt
8 tbsp unsalted butter, at room temperature
1/2 cup creamy peanut butter
1/2 cup granulated sugar
1/2 cup light brown sugar, packed
1 large egg
1 tsp vanilla extract
1 cup quick-cooking oats

For the filling:
3 tbsp unsalted butter, at room temperature
1/2 cup creamy peanut butter
1 cup confectioners' sugar, sifted
2 tbsp heavy cream

Preheat the oven to 350º. Line a baking sheet with parchment paper. In a small bowl, combine the flour, baking soda, baking powder, and salt. Stir together with a fork to blend. In the bowl of an electric mixture fitted with a paddle attachment, cream together the butter, peanut butter and sugars on medium-high speed until light and fluffy, about 2-3 minutes. Blend in the egg and vanilla extract. Add the dry ingredients and mix on a low speed until just incorporated. Stir in the oats with a spoon until evenly blended.

Scoop about 2 teaspoons of the dough onto the cookie sheet. Roll them into a ball. Bake about 10 minutes (mine only took 7-8 minutes), rotating the sheet halfway through. The cookies will be light golden brown and slightly puffed. Cool on the baking sheet about 5 minutes, then transfer to a wire rack to cool completely. Repeat with remaining dough.

Once the cookies have completely cooled, pair them up by size. To make the filling, combine the peanut butter, butter, and confectioners' sugar in the bowl of an electric mixer. Cream together until well combined. Mix in the heavy cream until smooth and fluffy. Spread a small amount of filling on the flat side of one cookie and sandwich together with the remaining cookie and press down so the filling reaches the edges.

Friday, January 21, 2011

Pumpkin Butterscotch and Chocolate Chip Cookies

We are a one-car household. At least for a few more weeks. So when I don't have school, Neil takes the car and I stay home for the day. Sometimes I get cravings, especially for sweet things. I spent this morning studying for my American Indian Studies class and when I took a break I could not stop craving sweets. We don't buy any junk food so I couldn't find any Oreos hiding in the back of the closet or even a long-forgotten piece of Halloween candy.

The only thing we had in the closet that was even partially sweet was pumpkin and some leftover butterscotch and chocolate chip morsels. I googled "Pumpkin and Butterscotch" and found this recipe from Annie's Eats on the very bottom of the first page. I follow her blog and I can't believe I didn't bookmark this recipe when I saw it. I didn't have the full amount of butterscotch or chocolate chips so I split the batter into thirds and did 1/3 butterscotch, 1/3 chocolate chips, and 1/3 mixed.

The butterscotch and pumpkin cookies were by far my favorite. The mixed ones and the chocolate chip only ones were delicious but there was something about the flavor mix of pumpkin and butterscotch that just did it. And even though pumpkin may be considered out of season, it was a delicious treat to enjoy! Makes about 2 dozen cookies.

2 cups all-purpose flour
1.5 tsp. baking powder
1 tsp baking soda
1/2 tsp salt
1 tsp ground cinnamon
2 large eggs
1 cup sugar
1/2 cup vegetable or canola oil
1 cup pumpkin puree
1 tsp vanilla extract
1 cup butterscotch chips (or a mixture of butterscotch and chocolate chips)

Preheat the oven to 325º. Line two baking sheets with parchment paper to help keep the bottoms from browning or burning. Ina small bowl, combine the flour, baking powder, baking soda, salt, and cinnamon; whisk to blend. In a bowl of an electric mixer, combine the sugar and eggs. Beat on medium-high speed until smooth and light in color, about 1 minute. Blend in the oil, pumpkin puree, and vanilla extract until well combined. With the mixer on a low speed, mix in the dry ingredients until just incorporated. Fold in the butterscotch and/or chocolate chips with a spatula.

Drop mounds of dough onto the baking sheets, spacing them a few inches apart. Bake, rotating the sheet halfway through, until the tops feel set and a toothpick or fork comes out dry, about 14-16 minutes. Allow to cool on the baking sheets for 5-10 minutes before transferring to a wire rack to cool completely. Eat right away or store in an airtight container. Enjoy!

Linking up with Sweets for a Saturday!

Sunday, January 16, 2011

Deep Dish Brownies

I have made so many sweets in the past week and a half. Even though I usually send about 2/3 of the with my hubby to work I still feel like I've gained a pound or two. I have no idea how the ladies who have pure baking blogs and post every day do it. I think I might have to swear off sweets for awhile.

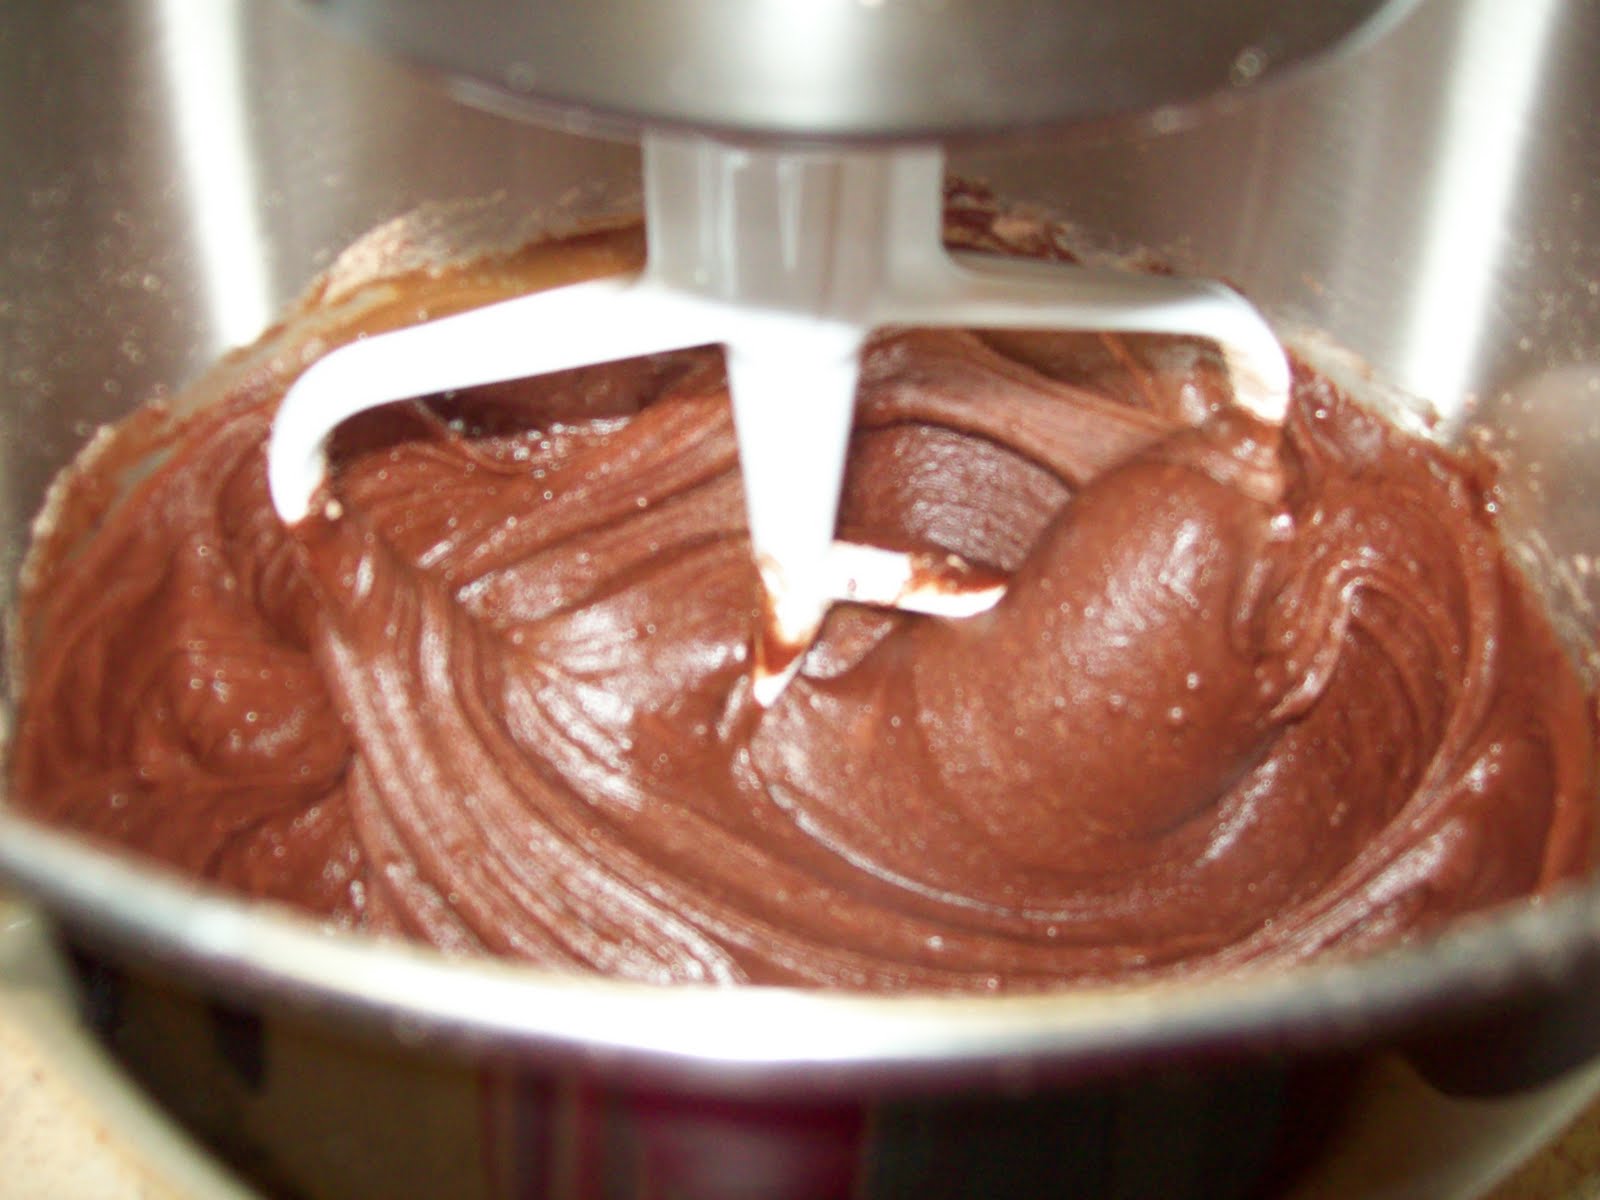
These brownies were the first thing I made with my new KitchenAid mixer. Check out this baby in action...
She's amazing! The recipe comes from Hershey's so you know it has to be good. They were deliciously chocolatey and perfect for my chocolate cravings!

3/4 cup butter or margarine melted
1.5 cups sugar
1.5 teaspoons vanilla extract
3 eggs
3/4 cup all-purpose flour
1/2 cup Hershey's cocoa
1/2 tsp baking powder
1/2 tsp salt

Heat oven to 350º. Grease 8 inch square baking pan. Combine butter, sugar, and vanilla in bowl. Add eggs and beat well. Combine flour, cocoa, baking powder and salt. Gradually add to egg mixture and beat until well blended. Spread batter evenly into prepared pan. bake 40-45 minutes. Cool completely in pan on wire rack. Cut into bars. Enjoy!

PS-Be on the lookout for a giveaway coming within the next few weeks!

Friday, January 14, 2011

Boiled Oatmeal Cookie

When I was little, my dad used to make us boiled oatmeal cookies about once a month or so. We weren't allowed in the kitchen while he was making them and he would never tell us the secret ingredients. He'd spend about 10 minutes in the kitchen and then bring us each a plate of oatmeal cookies. Except, they wouldn't be small little cookies; they'd be big pies. We'd each get a plate and a big glass of milk. They were delicious but would always be too sweet to finish so we'd save them for breakfast the next morning.

I finally got the recipe when my aunt put all of her recipes, along with other family members, in a cookbook and gifted us with it on Christmas. While looking through some blogs, I found a recipe for No Bakes which is almost exactly like my dad's boiled oatmeal cookies. There were a few differences but it was almost exactly the same. This is another chocolate and peanut butter combination that can become quite addicting!

2 cups sugar
1/2 cup milk
1/4 cup cocoa powder
1 stuck butter
3 tbsp peanut butter
3 cups quick oats
1 tsp vanilla

Combine the sugar, milk, cocoa, and butter in a sauce pan. Bring to a rolling boil and allow to cook for about 2 minutes. Remove from heat and stir in the rest of the ingredients. Drop by spoonful onto parchment paper and allow to set. Or grab a big glass of milk, plop some on a plate and enjoy!

Peanut Butter Blossoms


This is another easy recipe from Abby. There are plenty of homemade peanut butter blossom recipes out there but these are just as delicious as their homemade counterparts. Peanut butter and chocolate is one of my favorite combinations. Whenever I hear those Reese's commercials or see them on TV I start craving. These are delicious and would be a perfect fix for me peanut butter and chocolate cravings!

Bagged peanut butter cookie mix or pre-maid ready to bake dough from refrigerator
Hershey's kisses

Mix the dough according to directions. Roll dough into 2 inch balls. Bake according to the directions until they are slightly done. Remove cookies from oven an immediately press Hershey kiss into center of the cookie. Do not remove cookies from the pan until they are entirely cooled and the chocolate is no longer mushy. It usually takes awhile for them to cool completely and moving the cookie will cause the chocolate to melt and lose its shape.

Thursday, January 13, 2011

Decorated Sugar Cookies


I just thought I would post a picture of the beautifully decorated sugar cookies that I mentioned in the post below! I know it's a little late for Christmas but hopefully I'l be posting some decorated cookies that are as beautiful as the ones Abby made in the next few weeks!

Lemon Bars


For Christmas, we flew back to Georgia in order to be with our families. I love going home and being able to see our family and catch up on everything. We only make it back to Georgia about twice each year so we try to fit in as much time with family as we can. This means, we eat a ton! We saw a lot of people while we were home but that also meant we ate a lot of food. I didn't mind too much, especially since every woman in my family is pretty much an awesome cook. Well, my grandma isn't exactly a fan of cooking but she makes her own wine which is pretty tasty! My uncles girlfriend, Abby, is no exception. She always brings the most delicious baked goods to our get-togethers and they never disappoint.

For our Christmas Eve dinner, we always get together and have lots of appetizers and a lot of desserts. This year, Abby brought decorated sugar cookies, peanut butter blossoms, and these delicious lemon bars. I'm personally not a lemon kind of person but my husband loved them! I saw him consume at least 5 and I know he most likely had more. Neil has been begging me to make these ever since we got back to California.

I messaged Abby for the recipe and was surprised when she let me know they were actually from a box! Neil assures me they tasted completely homemade and were definitely blog-worthy. One of the best things about boxed desserts is that you don't have to spend a lot of time putting these together. Around the holidays this is a bonus. With all the desserts Abby brought, especially the decorated sugar cookies which take forever, these most certainly made her baking easier. By arranging them on a cute platter and adding a little dusting of powdered sugar, Abby made a delicious dessert!

Box of Lemon Bars from Krustaeaz
1/3 cup water
3 eggs
powdered sugar, optional

Preheat your oven to 350º and spray an 8 inch pan with cooking spray. Mix the water and eggs and stir in the filling. Let the filling sit while you work on the crust. Pour the bag of crust into an 8 inch pan and press into the bottom and slightly up the edges. Bake the crust for 8 minutes. Add the filling on top of the baked crust and bake for 22 minutes. Allow the lemon bars to cool completely before cutting. Cut into squares, plate, and sprinkle powdered sugar on top. Enjoy!